How to create custom fields for my contacts?
To create custom fields follow these instructions:
At the bottom of the sidebar you'll see your name. Click on it.
Click on "Settings”.
Click on "Custom Fields”.
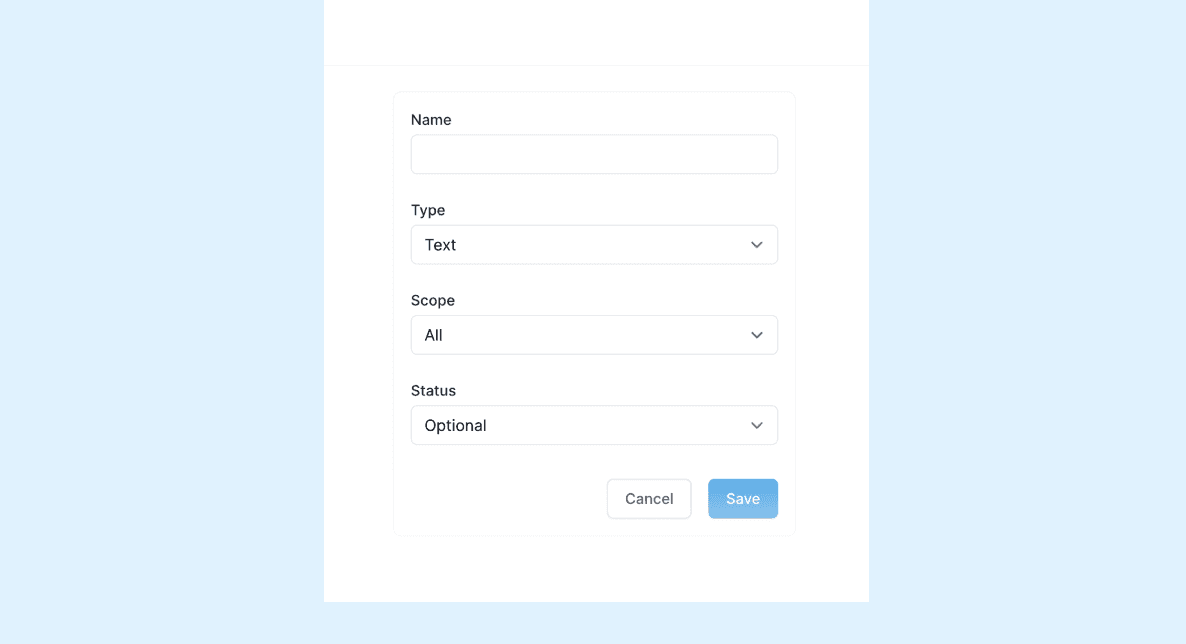
Click the "New" button at the top. This will open a form for creating a new custom field.
Input a Name for it.
Input the type of field you want to use.
Input the scope: if it's available for a contact or a company.
And finally, input the status if it's optional or not.
Once ready, click the "Save" button.

How to fill up the form?
Name: This is the title of the custom field. Example: If you own a Fitness center, you might need a custom field for Fitness Goal.
Type: This is the type of field you want to use. The options are: datepicker, email, number, phone, textarea and text. Choose the option that best fits your needs. Example: For a fitness goal you might wanna pick "text" to add a short answer, or you can pick "textarea" to allow for more explanation.
Scope: When you use the form to add a new contact, you can add a contact or a company. This option allows the custom field to be added to the form to add a contact and/or to the form to add a company. The option are All to add it to both, contact or company to add it just to the one. Example: Fitness Goal might be needed only in contact and not in a company.
Status: This option allows you to pick if this custom field is required, optional, hidden or collapsed. You can use the hidden option when you want to retire a custom field without deleting it.
✍️ Tip: If you are unsure of all the options, try adding as many custom fields you want and test them in a contact. You can always delete any custom field you don't need.
⛔️ Before deleting a custom field, please ensure that you are absolutely certain about your decision. It's crucial to be certain about your choice because once a custom field is deleted, all the associated information will be permanently lost and cannot be recovered.